All bespoke 1-2-1 training courses to be taught remotely till further notice
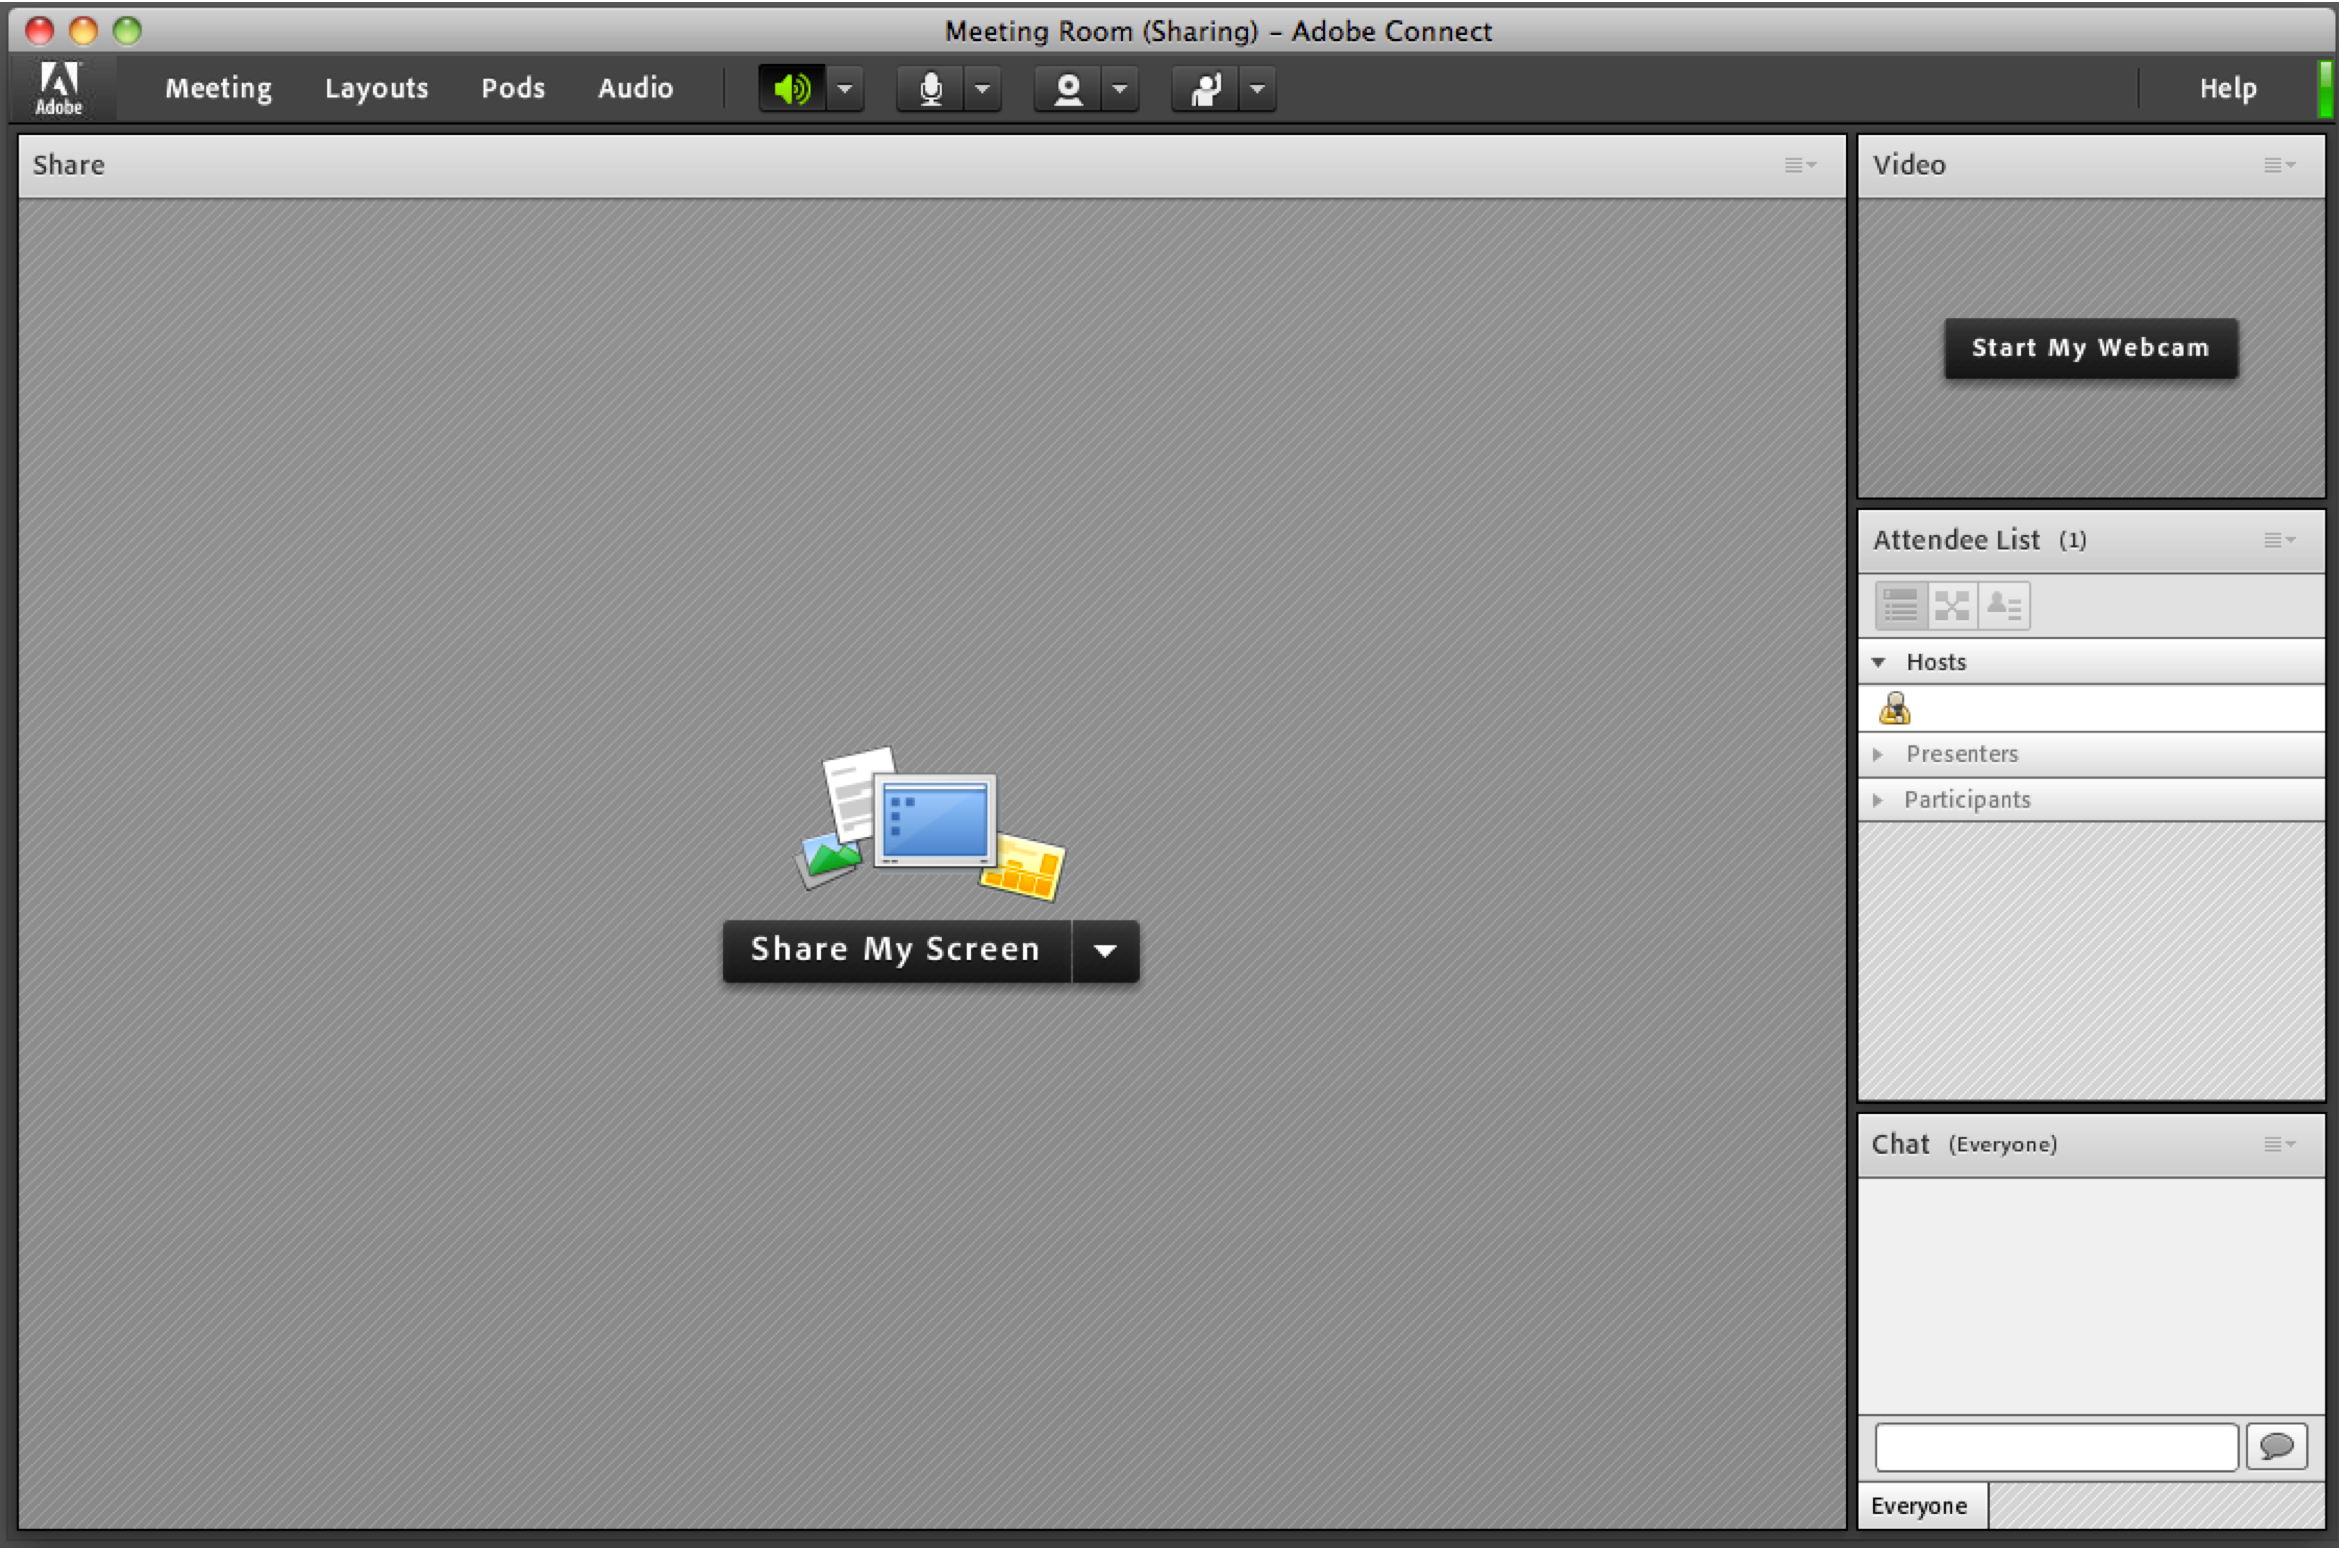
During the current situation with coronavirus we have decided to provide all of our courses via secure online educational conferencing software till the situation is resolved. We hope to return to classroom training before long. But meanwhile we’ll run our courses using Adobe Connect software which is secure, extremely user-friendly and stable.
How will this training work?
Once your booking has been confirmed, you will receive an email from us inviting you to an Adobe Connect meeting. In order to commence the training you need only click on the link at the time and date specified to join the session. If you’d like to try out an Adobe Connect demo, please use this link.
We will be there waiting for you, ready to provide you with bespoke 1-2-1 training on your preferred application.
Easy to set up
It’s really easy to use Adobe connect. All you need are the following;
A computer or laptop with the relevant software (either Mac and Windows – both are fine)
An integrated video camera (or an external one)
An integrated microphone Headphones or earphones that you can use on your computer
A reasonably fast, reliable internet connection (hard-wired ethernet is faster than wireless)
For the best experience we recommend a large monitor of 21″ or more. Smaller screens work almost as well but you may need to zoom in and out a bit more on those.
You should download Adobe Connect software before the your training commences. This will allow you to test your connection and computer before the training day.
So you see, it’s easy to carry out our bespoke training courses online. You can book by the hour – making it easier to fit around your busy schedule.
Our senior trainer, Angie Taylor is a working animator, illustrator and motion graphic designer.
“it’s important for me to keep working at my day job – as well as being a training provider. About 50% of my work is training but I still take on a few creative jobs each year in order to test my skills and to develop new techniques. “
This animation was commisioned by Bright Marbles – a Silicon Valley company with an intruiging product, Opus. Opus is a product that uses artificial intellegence to help inventors to articulate and develop their products and ideas. Its a very difficult product to explain as it is quite unique.
“The company were looking for a new way to communicate the benefits of their product. They had previously used video of people talking about the product but felt that this was dull and did not get the concept of the product.
I directed and managed the project. I wanted a style of artwork that was loose, imaginative and humorous. So I decided to collaborate with illustrator, Belle Mellor on this project. I’ve worked with Belle before and I love the loose, freedom, humour and inventiveness of her work.
Together we brainstormed a few ideas, both sketching out a few core concepts. We then developed a script and storyboard based on the ideas becoming characters on a journey through a pipeline. Opus being the heroic, angelic character that helped the ideas on their journey from conception to final product production.
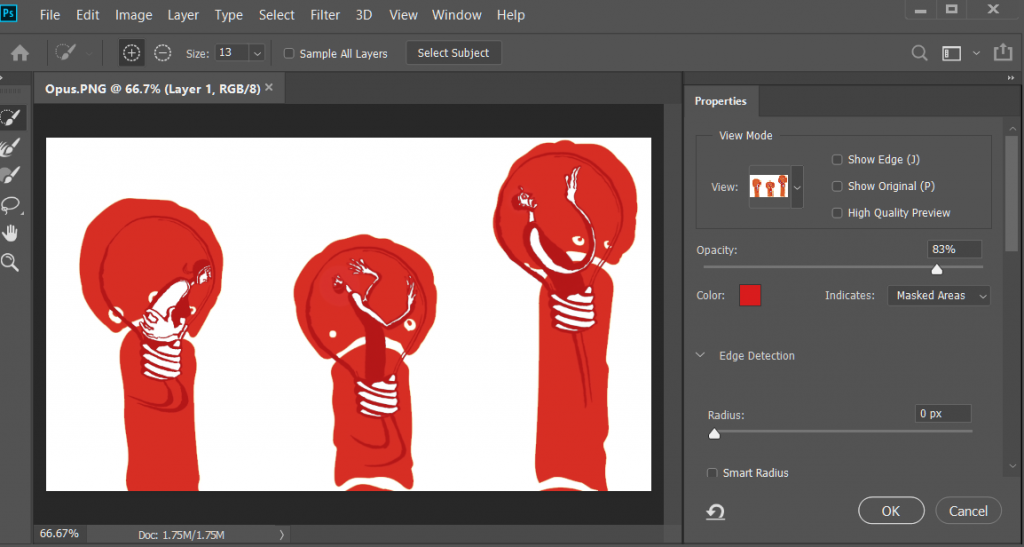
The first stage involved cleaning up the hand drawn images and splitting them into layers in Photoshop. Working out the correct scale of the images was an important factor. When you work in 3D, you tend to zoom in and out of the images. I had to ensure that all line work would look equal during the animation. It’s also important to remove any marks and backgrounds before animation takes place. I used Select and Mask and the Content-aware tools to adapt the drawings for this.
“I used Select & Mask in Photoshop to clean the layers, ready for animation in After Effects.”
I built a 3D pipeline in MasterpieceVR, using my trusty HTC Vive headset. I created the entire project on my Gigabyte Aero laptop. It’s a powerful beast with an on board NVIDIA® GeForce® GTX 1070 which coped admirably with all the VR and 3D rendering I threw at it.
This was all imported into Cinema 4D where I used the Sketch and Toon features to match Belle’s hand-drawn look & feel. I then imported the Cinema 4D file into After Effects via the Cineware plugin. In After Effects I composited Belle’s drawings and 2D stop-frame animations into the 3D scene. I also added some of my own animations here, animating some of the characters using the Rubberhose scripts and taking advantage of After Effects new Master properties to help make the complicated structure easier to manage. There’s a tutorial on Master Properties in my course about Rubberhose animation in After Effects here.
I then brought in musician, Lucy Edwards to help with the music. Together we came up with a humourous melody. Lucy played all the parts on my Roland W30 keyboard. I edited and produced it in Apple’s Garageband. I then added a few sound effects in Adobe Audition. I edited the Audio and the Sound effects to the animation in Adobe Premiere Pro. I found that the the Auto-ducking features to make this process failry quick and easy. The final voiceover was added at this satge so that it fitted the animation perfectly.”
If you want to learn how to do any of the things mentioned in this article you can book Angie for one-to-one training at Creative Cabin. We run bespoke courses for all types of creative professionals. These courses can be booked at the Creative cabin studio, or can be done remotely via Adobe Connect.
We’re giving away some free festive presets in December’s newsletter to say thanks to all our friends for supporting Creative Cabin in 2016. Please fill in the form below to sign up for this and future newsletters. Each month you’ll receive tips, presets or tutorials as well as occaisional special offers for training at Creative Cabin.
By submitting your details, you are indicating your consent to receiving emails from us.
Here’s my latest collection of After Effects Twitter Tips from the Creative Cabin archive.
Learn all sorts of useful tips and tricks in bite sized portions. Make sure to Follow us on Twitter to get even more of these tips regularly as well as other goodies welike to share.
AFTER EFFECTS TIP | To make a one node camera point at a layer, select the layer, then with the unified camera tool selected, hit the F key
AFTER EFFECTS TIP | Copy & Paste any mask shape into a position property to make layer move along the path. Click on property name to select
AFTER EFFECTS TIP | Give Adobe your feedback | Report Feature Requests & bugs here; http://t.co/s7f1NOPs @AdobeAE #AfterEffects
AFTER EFFECTS TIP | To stretch or squash an animation – select all keyframes – hold Alt key & drag first or last Keyframe in selected group
AFTER EFFECTS TIP: Video tutorial – Use the Stroke effect on Illustrator paths to make handwriting animate on screen http://t.co/0E6UHcKOsr
AFTER EFFECTS TIP: How to make a layer follow a path copied from Adobe Illustrator artwork. http://fb.me/CEapjgCw
AFTER EFFECTS TIP: add new Refine Matte effect to ANY matte in AE to refine edges or add motion blur. Not just for Rotobrush! Fabulous tool!
AFTER EFFECTS TIP: Animating characters, use expression pickwhip 2 link body parts 2 cntrl layer. Expression control effect 4 each movement.
AFTER EFFECTS TIP: How to make a layer follow a path copied from Adobe Illustrator artwork; http://bit.ly/f8tP4w
AFTER EFFECTS TIP: Lay down markers in time with audio by previewing the audio and hitting * on number pad when you want markers to appear.
AFTER EFFECTS TIP: to edit the path of an effect’s positional property (e.g. Particles) got to Layer panel & choose effect in target menu.
AFTER EFFECTS TIP: To use more than one layer as matte without precomping. Add multiple copies of Sett Matte effect to layer needing matted.
AFTER EFFECTS TIP: @butlerm_com Try combining transfer modes, use more than one layer with a different mode and opacity value on each! 🙂
AFTER EFFECTS TIP: Add keyframes for hidden Transform properties by selecting layers & hitting alt & property letter (eg alt-p for position)
AFTER EFFECTS TIP: Applied a preset & wanna find out how it’s made? Select layers then double-hit the U key to expose adjusted properties.
AFTER EFFECTS TIP: Make 3D layers turn to face camera as it moves. Select layers, go to Layer>Transform>Auto Orient. choose Towards Camera
AFTER EFFECTS TIP: Right-click on a property value to open Edit Value dialog. Here u can access different measurement units & adjust ranges.
#AfterEffects Tip | Rotate , scale, skew or move all layers by adding the Transform effect to Adjustment layer – keyframe to animate them
#AfterEffects Tip | Scaled a layer down, nested the comp, then scaled it up? Click Collapse Transformations switch to fix resolution issues.
#AfterEffects Tip | Travis Wade presents his After Effects: Copy and Paste Shortcuts on Motionworks; http://t.co/nP2yA1nJ
#AfterEffects Tip Make layer automatically turn to follow direction of path – select layer, go to Layer > Auto Orient. Choose ‘Along Path’
#AfterEffects Tip | Isolate a property group from the Effect Control Panel in Timeline by double-clicking Property Group name in ECW
#AfterEffects Tip | Do you have trouble with slow render speeds? Here’s a video workshop by Todd Kopriva to help: http://t.co/Y45ucGEl
#AfterEffects Tip: Do you have trouble with slow render speeds? Here’s a video workshop by Todd Kopriva to… http://t.co/2fL7wE8l
#AfterEffects Tip – Scale layers in comp without messing up composition – Select layers – Go to File > Scripts > Scale Selected Layers
#AfterEffects Tip | @Doguib7 Create a Shape Layer, use Offset Paths & Trim Paths from Shape Layer ‘s “Add” menu to animate paths – lotsofun!
#AfterEffects Tip | Animate property randomly – Alt-click Stopwatch to add expression. Type Wiggle(10,50) to change value 10 p/sec within 50
#AfterEffects Tip | Audio file plays at different speed than recorded? Check that RAM preview settings match the frame rate of the audio.
#AfterEffects TIP | Custom Shape layers – 1 Layer > New Shape Layer 2 Draw path with pen 3 Select path property – paste custom path @Doguib7
#AfterEffects Tip | Drag comps directly to Adobe Media Encoder to render in background. Allows you to continue working on other comps in AE
#AfterEffects Tip | Loop Footage – select clip, go to Interpret Footage > Main > Other Options > Choose how many time you want to loop 🙂
#AfterEffects Tip | Quickly deselect selected items by hitting F2. On Mac make sure to use Fn key to override system shortcuts.
#AfterEffects Tip | Replace layer in Timeline with footage from Project panel (retaining fx + KFs) – Select both, hit Cmmd+Alt+/ Ctrl+Alt+/
#AFTEREFFECTS TIP | Rubbish at animating? Don’t worry! Use the Motion Sketch panel to record mouse or pen motion & apply it to your layer 🙂
#AfterEffects Tip | Video Tutorial – how to make your own “Old Film” effect using Turbulent Noise; http://t.co/IOn0bHVPuU @AdobeAE #Mograph
#AfterEffects Tip | Video tutorial – Use the Stroke effect on Illustrator paths to make handwriting animate on screen http://t.co/APabrfE9FT
#AFTEREFFECTS Tip 41: RT @i2cblog: In Project panel, search ‘unused’ or ‘missing’ to see what’s not used in any comp or source is missing
#AfterEffects tip; Moving project to other machine or archiving? File > Collect Files gathers all source footage & project maintaining links
#AfterEffects tip; Scale layers or comps without messing up composition. Go to File > Scripts > Demo palette. Use Scale Layers
#AfterEffects Tip; Use Premiere Pro to cut footage, add simple animation to layers in real time. Dynamic Link portions to AE for finessing
#AfterEffects Tip: @Franckmax If you want to do that, just Toggle hold the keyframe first, then right-click and choose “Easy Ease Out/In” 🙂
#AfterEffects tip: @jamesboorman To make the particles stay “alive” for longer, adjust the Lifespan property.
#AfterEffects Tip: @MarkToddWagon No need for Alt, Page Up & Down on their own works. Home & End key to move to 1st & last frames of comp.
#AfterEffects Tip: 3D layers have Material Options to control shadows. Cast Shadows & Accept Shadows can be switched on or off per layer.
#AFTEREFFECTS tip: Animate Source Text property 2 make words change over time in text layer. Font & character panel attributes also animated
#AfterEffects tip: Convert Text to Shape layers (Layer > Create shapes from Text) – Add cool Shape properties to get creative! Endless Fun!
#aftereffects tip: Create a keyframe for a property on selected layers by holding alt key & tapping property shortcut. P for Position etc
#AfterEffects Tip: Even out animation speed – select Keyframes in timeline (except 1st & last KF). Right-click & choose “Rove Across Time”
#AfterEffects Tip: Found a camera move or lighting setup you like? Remember you can save them as Animation Presets to use in other comps.
#AfterEffects Tip: Give footage instant punch & contrast – duplicate layer – make top layer Overlay Blend mode – adjust Opacity to taste 🙂
#AfterEffects Tip: Have layers in comp that you don’t want to render? Select Layer, go to Layer > Guide Layer to create non-rendering layer.
#AfterEffects tip: Help with custom shatter maps. Re: Is this done with shatter effect? http://cr8v.co/wCe [Like it? http://bit.ly/lRPIGH ]
#aftereffects tip: Huge files? Slow render times? Select layer in Project, go 2 File > Create Proxy. Makes linked low res version of file!
#AfterEffects tip: Jump back & forth between visible keyframes & layer markers by hitting J & K. Trouble remembering? Think JUMP KEYFRAMES!
We teach several different art & design classes for kids. Our most popular course by far is our Photoshop courses for kids.
Graphic designers use special software like photoshop to achieve effective images an designs. The main goal of Photoshop course for kids is to teach children how to enjoy creating images in easy and understandable way.
Drawing is a great way for kids to express themselves. It helps the to develop creative thinking and imagination.
Photoshop program is probably the most popular tool for editing images. In this course, your child will learn how to use and manipulate photographs. Basic editing, retouching and colour correcting of digital imagery.
The goal of this course is to kickstart your kid’s creative career at an early age. To help to equip them with the essential skills and knowledge for a career in the creative arts.
Angie teaches drawing, painting and sculpture. she can teach using traditional materials. If your child prefers, she can teach digital drawing, painting and sculpture skills.
Animation
Angie teaches all types pf animation. Adobe Character Animator is a great place to start for any child wanting to get into animation or game design.
Art appreciation
Angie teaches children about the history of art and design. Using examples that kids can relate to, she brings the stories of art to life.
3D & Sculpture
Angie has an honours degree in Sculpture. She can teach children how to create 3D models & digital sculpture using intuitive 3D software. She also teaches VR art & sculpture techniques.
Problem solving
your Angie teaches practical skills for planning creative projects. She’ll teach children how to be inventive and to think outside the box.